Having bought a bottle of expensive Yuzu juice from a shop specialising in Japanese product, I baked some Japanese Cheesecakes and when I said some, I meant like 5 cakes over a weekend. The cheesecakes look rather plain and so I made some Yuzu Curd, first to decorate the plain looking cakes and secondly to stretch the Yuzu juice. It turned out nice and aromatic.
Ingredients
100g caster sugar
75g unsalted butter
3 egg yolks
2 eggs
Zest of 2 lemons (zest of Yuzu fruit if you are able to lay your hands on this very expensive fruit)
3.5 tbsp of Yuzu juice
1. In a heat proof mixing bowl, rub the zest into the caster sugar.
2. In a big pot, boil water (about an inch deep) and lower the heat so the water is simmering.
3. Add the eggs and yolks to the mixing bowl and place the mixing bowl over the simmering water and cook the mixture, whisking continuously.
4. The Curd is ready when it thickens to a consistency resembling yogurt.
I used this to decorate the many cheesecakes I baked for a few birthdays over 1 weekend. I really like the refreshing taste and zing of the Yuzu.
Wednesday, March 15, 2017
Matcha Scones
I needed something to eat with the clotted cream, so I made matcha Scones. I needed to use up the matcha powder anyway. They turned out nicely moist and hearty. Best eaten with jam and of course the clotted cream.


Here's the recipe.
Ingredients
235g all purpose flour
90g unsalted butter (cubed and cold)
90g whipping cream
50g caster sugar
10g green tea powder
1 egg
1 tbsp baking powder
1/4 tsp salt
1 tbsp milk for glazing
1. Preheat the oven at 200 degree celcius.
2. Sift flour, green tea powder and baking powder together.
3. Add sugar and salt, whisking to combine.
4. Add the cold butter and rub the butter into the flour using the tip of your fingers. The resultant product should resemble coarse sand.
5. Add the egg and whipping cream and mix till just combined.
6. Roll the dough out and cut out 5cm rounds using a cookie cutter.
7. Leave to rest on a baking tray for 30 min.
8. Brush the top of the scones with milk and bake in preheated oven of 200 degrees for 13-15 minutes.
I made these delicious Scones to go with jam and painstakingly made clotted cream. It was delicious!


Feels like a classy high tea session already.

Freshly baked and smelling yummy

Gave them some light for 'good skin'

Preparing them to be packed and shared

One more
Ingredients
235g all purpose flour
90g unsalted butter (cubed and cold)
90g whipping cream
50g caster sugar
10g green tea powder
1 egg
1 tbsp baking powder
1/4 tsp salt
1 tbsp milk for glazing
1. Preheat the oven at 200 degree celcius.
2. Sift flour, green tea powder and baking powder together.
3. Add sugar and salt, whisking to combine.
4. Add the cold butter and rub the butter into the flour using the tip of your fingers. The resultant product should resemble coarse sand.
5. Add the egg and whipping cream and mix till just combined.
6. Roll the dough out and cut out 5cm rounds using a cookie cutter.
7. Leave to rest on a baking tray for 30 min.
8. Brush the top of the scones with milk and bake in preheated oven of 200 degrees for 13-15 minutes.
I made these delicious Scones to go with jam and painstakingly made clotted cream. It was delicious!

Enhancing the colour to make them look for appetizing. They tasted really good.
Friday, March 10, 2017
Sunday, March 5, 2017
Clotted Cream
The last trip to Langkawi inspired this clotted cream. We had the high tea at St. Regis and we thought the cream served on the side with the scones was delish and apparently it was clotted cream. I went online to research on clotted cream and there are a number of ways to make it. The most relaxed way seems to be the oven method. Simply pour 2 cups of cream into a shallow dish and place in the oven and bake for 12 hours in a preheated oven at the lowest temperature. Easy as pie.

Ingredients
2 cups of heavy cream
1. Preheat the oven at the lowest temperature.
2. Pour 2 cups of heavy cream into a glass shallow dish with a big surface area.
3. Bake for 12 hours, overnight.
4. Carefully remove the cream from the oven after 12 hours being careful not to agitate the cream.
5. Leave to cool for about 30 minutes, cover and leave in fridge for another 12 hours.
6. Use a spoon and carefully collect the luscious clotted cream formed.
7. Gently stir till smooth and creamy and store in a jar. This can keep in the fridge for up to 5 days.
8. For the remaining cream in the dish after collecting the clotted cream, use them to make scones.
After patiently waiting for 12 hours, here's the precious clotted cream.

I had the clotted cream with matcha Scones and maybe because they took 12 hours, I savoured every bite. It is lovely, only we'll need some nice scones to go with the clotted cream.
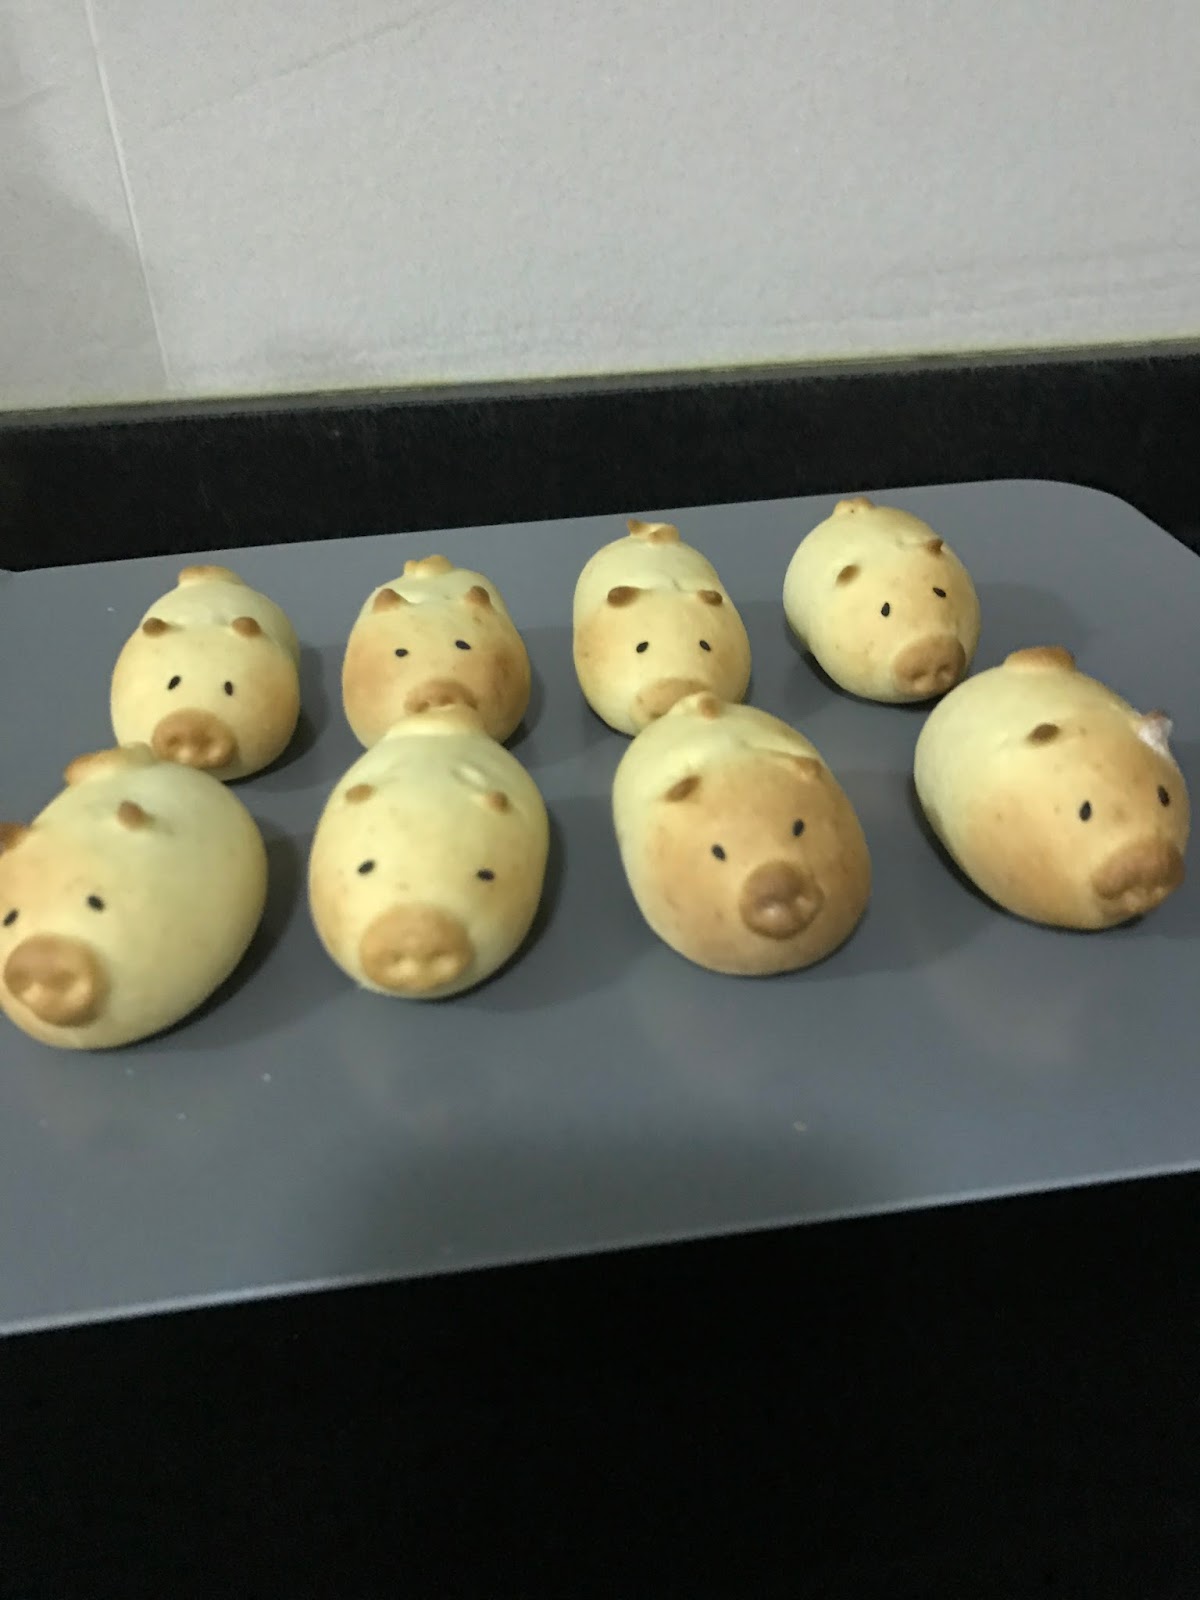
Japanese light snack- 莲蓉猪
Baking calms me and helps me to relief some stress. Crazy busy recently and I can only afford to bake these easy peasy Japanese nice snack. They're quite easy to bake, try them.

I lined them up and gave them good skin with the lighting. They look ubly cute!

Ingredients
120g white lotus paste (I used sugar free ones)
115g cake flour
99g condense milk
25g egg yolk
2.5g baking powder
Black sesame seeds
1. Whisk together condense milk and egg yolk.
2. Sift in the flour and baking power and mix till combined.
3. Flatten the dough into a disc and chill for about 30 minutes.
4. Meantime, prepare the lotus paste, making 15g rounds.
5. Divide the dough into 25g rounds.
6. Wrap the lotus paste in the middle of the dough and they are ready to be shaped.
7. Make 'v' cuts at the sides and pull out the ears.
8. Using the extra dough, make the nose, using the rounded side of a satay stick to make the nostrils. Finish with sesame seeds as eyes.
9. Make the tail as well.
10. Bake the light cake in a preheated oven of 150 degree celcius for about 20 min.


Marshmallow Chocolate Brownies
Was asked to bake for a family gathering and I only had time to bake simple stuff. Decided on a fast Butter Cake, which was tested earlier on. I wanted something for the youths too, so I thought chocolate brownies would be well received. I had some marshmallows left, so I added some and I thought the amount of sugar stated in the recipe was too much, so I boldly halved the amount. With Christmas and the new year just over, the chocolates I received came in handy and using them in the brownies meant no wastage later on because we hardly eat chocolate. Genius! Here's the recipe.


(Makes a standard tray)
Ingredients
300g all purpose flour
300g caster sugar
260g brown sugar
250g chocolate (I used good quality dark chocolate, chopped)
150g cocoa powder
350g unsalted butter (melted)
6 eggs
About 10 big marshmallows
2 tsp vanilla extract
Method
1. Line the baking tray with parchment paper. Preheat the oven at 160 degree celcius.
2. Melt the butter and leave to cool.
3 Sift the flour and cocoa powder together.
4. Mix the sugar, flour cocoa powder mix, vanilla extract and melted butter together till combined.
5. Add the chopped chocolate and Marshmallows and fold into the mixture till combined.
6. Bake in preheated oven of 160 degrees for about 45 minutes and leave to cool before slicing and eaten warm or cool completely to be stored in airtight container.
I quite like the contrasting textures of the soft marshmallows to that of the crispy exterior and gooey chocolate center. I'll torch the marshmallows the next time. Think it'll be called s'mores brownies.

Till next time...
Subscribe to:
Comments (Atom)